Android allows us to implement Google Maps in our application.
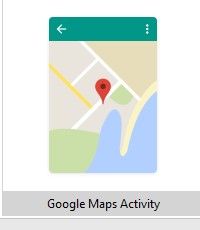
Create A new Project in Android Studio and Select Google Maps Activity.
GoogleMapsActivity will by default give you a fragment that will display a map layout with a default Activity with the below permission Manifest.
It will also give a file named google_maps_api.xml as below where we need to pass an API key which will enable your map display.

Go to web browser and search for Google Developer Console and click on the below link

It will open a console like below and then click on Select a project, It will open a Dialog and then click on plus sign to create a new project.


Fill all the details of your project agree the terms and click CREATE
On Left Panel click on Library it will open the below layout click on Google Maps API and enable it.

Create credentials as below.


It will generate an API Key that you need to copy and paste in your google_maps_api.xml.
The below code comes by default when you select GoogleMap Activity.
activity_maps.xml
MapsActivity.java
onMapReady(GoogleMap googleMap):-
It is an overriden method which is called when the map is ready to be used.
LatLng is a class that takes lattitude and longtitude of a location.
addMarker():- is used to add Marker on the map according to the defined latlng.
moveCamera():-takes the focus to the location of specified latlng.
Steps to Implement Google Map in our Application
Step 1:
Create A new Project in Android Studio and Select Google Maps Activity.
GoogleMapsActivity will by default give you a fragment that will display a map layout with a default Activity with the below permission Manifest.
<uses-permission android:name="android.permission.ACCESS_FINE_LOCATION" />
It will also give a file named google_maps_api.xml as below where we need to pass an API key which will enable your map display.
Step 2:
Steps to generate Google Maps API Key
Go to web browser and search for Google Developer Console and click on the below link
It will open a console like below and then click on Select a project, It will open a Dialog and then click on plus sign to create a new project.
Fill all the details of your project agree the terms and click CREATE
On Left Panel click on Library it will open the below layout click on Google Maps API and enable it.
Create credentials as below.
It will generate an API Key that you need to copy and paste in your google_maps_api.xml.
The below code comes by default when you select GoogleMap Activity.
activity_maps.xml
<fragment xmlns:android="http://schemas.android.com/apk/res/android"
    xmlns:map="http://schemas.android.com/apk/res-auto"
    xmlns:tools="http://schemas.android.com/tools"
    android:id="@+id/map"
    android:name="com.google.android.gms.maps.SupportMapFragment"
    android:layout_width="match_parent"
    android:layout_height="match_parent"
    tools:context="eazy.googlemapsexample.MapsActivity" />
MapsActivity.java
package eazy.googlemapsexample;

import android.os.Bundle;
import android.support.v4.app.FragmentActivity;

import com.google.android.gms.maps.CameraUpdateFactory;
import com.google.android.gms.maps.GoogleMap;
import com.google.android.gms.maps.OnMapReadyCallback;
import com.google.android.gms.maps.SupportMapFragment;
import com.google.android.gms.maps.model.LatLng;
import com.google.android.gms.maps.model.MarkerOptions;

public class MapsActivity extends FragmentActivity implements OnMapReadyCallback {

    private GoogleMap mMap;

    @Override
    protected void onCreate(Bundle savedInstanceState) {
        super.onCreate(savedInstanceState);

        setContentView(R.layout.activity_maps);
        // Obtain the SupportMapFragment and get notified when the map is ready to be used.
        SupportMapFragment mapFragment = (SupportMapFragment) getSupportFragmentManager()
                .findFragmentById(R.id.map);


        mapFragment.getMapAsync(this);
    }


    /**
     * Manipulates the map once available.
     * This callback is triggered when the map is ready to be used.
     * This is where we can add markers or lines, add listeners or move the camera. In this case,
     * we just add a marker near Sydney, Australia.
     * If Google Play services is not installed on the device, the user will be prompted to install
     * it inside the SupportMapFragment. This method will only be triggered once the user has
     * installed Google Play services and returned to the app.
     */
    @Override
    public void onMapReady(GoogleMap googleMap) {
        mMap = googleMap;


        // Add a marker in Sydney and move the camera
        LatLng sydney = new LatLng(-34, 151);
        mMap.addMarker(new MarkerOptions().position(sydney).title("Marker in Sydney"));
        mMap.moveCamera(CameraUpdateFactory.newLatLng(sydney));
    }
}
onMapReady(GoogleMap googleMap):-
It is an overriden method which is called when the map is ready to be used.
LatLng is a class that takes lattitude and longtitude of a location.
addMarker():- is used to add Marker on the map according to the defined latlng.
moveCamera():-takes the focus to the location of specified latlng.
Some more methods that can be used with GoogleMap
mMap.getUiSettings().setZoomGesturesEnabled(true);
This will provide Zoom In and Zoom Out Gestures on the Map.

mMap.getUiSettings().setZoomControlsEnabled(true);
This will display plus and minus Buttons for Zoom in and Zoom Out.
The below methods are used to set the type of view that you need to display
mMap.setMapType(GoogleMap.MAP_TYPE_NORMAL);

OR
mMap.setMapType(GoogleMap.MAP_TYPE_HYBRID);

OR
mMap.setMapType(GoogleMap.MAP_TYPE_SATELLITE);

OR
mMap.setMapType(GoogleMap.MAP_TYPE_TERRAIN);


Thank you for sharing this with everyone.
ReplyDeleteAnd most thanks for properly guide for google maps in LatLng class, addmarker and moveCamera uses and setMapTypes.
Map For Marshmallows's user
ReplyDeleteMapsActivity.java
package myproject.marshmallowsmaps;
import android.Manifest;
import android.content.pm.PackageManager;
import android.location.Location;
import android.location.LocationListener;
import android.location.LocationManager;
import android.os.Bundle;
import android.support.v4.app.ActivityCompat;
import android.support.v4.app.FragmentActivity;
import com.google.android.gms.maps.CameraUpdateFactory;
import com.google.android.gms.maps.GoogleMap;
import com.google.android.gms.maps.OnMapReadyCallback;
import com.google.android.gms.maps.SupportMapFragment;
import com.google.android.gms.maps.model.LatLng;
import com.google.android.gms.maps.model.MarkerOptions;
public class MapsActivity extends FragmentActivity implements OnMapReadyCallback {
private GoogleMap mMap;
LocationManager locationManager;
@Override
protected void onCreate(Bundle savedInstanceState) {
super.onCreate(savedInstanceState);
setContentView(R.layout.activity_maps);
/* Permissions at run time
ActivityCompat.requestPermissions(MapsActivity.this, new String[]{Manifest.permission.INTERNET,
Manifest.permission.ACCESS_COARSE_LOCATION,
Manifest.permission.ACCESS_FINE_LOCATION}, 1);
locationManager = (LocationManager) getSystemService(LOCATION_SERVICE);
}
@Override
protected void onResume()
{
super.onResume();
SupportMapFragment mapFragment = (SupportMapFragment) getSupportFragmentManager()
.findFragmentById(R.id.map);
mapFragment.getMapAsync(this);
}
@Override
public void onMapReady(final GoogleMap googleMap)
{
if (ActivityCompat.checkSelfPermission(this, Manifest.permission.ACCESS_FINE_LOCATION) !=
PackageManager.PERMISSION_GRANTED && ActivityCompat.checkSelfPermission(this,
Manifest.permission.ACCESS_COARSE_LOCATION) != PackageManager.PERMISSION_GRANTED)
{
return;
}
locationManager.requestLocationUpdates(LocationManager.NETWORK_PROVIDER, 0, 0, new LocationListener()
{
@Override
public void onLocationChanged(Location location) // for current location
{
mMap = googleMap;
LatLng My = new LatLng(location.getLatitude(),location.getLongitude());
mMap.addMarker(new MarkerOptions().position(My).title("My Location"));
mMap.moveCamera(CameraUpdateFactory.newLatLng(My));
mMap.animateCamera(CameraUpdateFactory.zoomTo(12.0f));
}
@Override
public void onStatusChanged(String provider, int status, Bundle extras) {
}
@Override
public void onProviderEnabled(String provider) {
}
@Override
public void onProviderDisabled(String provider) {
}
});
}
}
[…] First You need to implement google map layout in your project which you have learnt in our previous tutorial if not than Click here. […]
ReplyDelete